Monday, December 2, 2024

Quick and Easy Cardmaking Monday Episode 1 - 12 Holiday Cards in a Snap!


Hi Everyone,

Thanks for stopping in today to see my holiday card creations. I wanted to start a series of sharing quick and easy cardmaking ideas. I wanted to create my Make a Card/Send a Cards (12) that I need quickly to mail out in just a couple of days. I had 12 leftover pieces from a past Stampin' Up! Tags Kit, so it was the perfect time to use them up. 


The cards I created had 2 or 3 duplicates of three of the image focal points you see. I think the colors are so pretty with all the metalic features.


For the cards, I cut 3 1/2" x 3 1/2" of the Regal Destressed Patterns Specialty paper for a hint of color and golden highlights. The Garden Greeen cardstock was cute 3 1/4" x 3 1/4". I also used a retired punch for the decorative corners. 


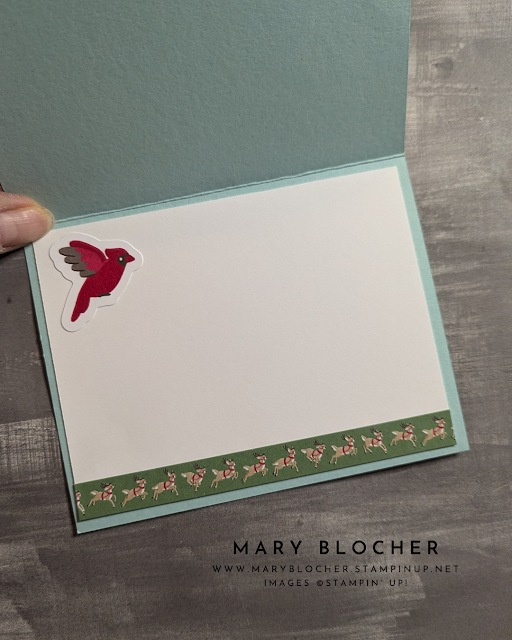
I think my favorite cards are the ones with the cardinal. I love birds and I think this one was designed and colored beautifully. 


I hope you enjoyed these quick and easy holiday cards. I hope you would agree that they are beautiful! My video gives more details on products used and upcoming specials.


Specials Beginning December 3rd (while supplies last)


When you place a minimum $50 order with me in December, you will be in a drawing to win a FREE January Specialty class with me. It's the Storybrook Moments specialty class. You could win a class kit FREE (more than $35 value). There is so much to love about cardmaking. Let me know which card you like best. 

Until Next Time...
Happy Stampin',
Mary's Stampin' Café


Saturday, November 16, 2024

Double Your Cardmaking with Layering Dies + A Freshly Make Sketches Layout

Hi Everyone,

I'm so glad you have stopped by for my blog today! I have a great tip to share on doubling your cardmaking with layering dies. The two cards I created came about when I layered two of my Thoughtful Expression dies onto Silver Foil paper and die-cut them out at the same time. When you do this with any of the layering dies, you will get a frame cut out and then the solid inside piece. 


My cards today are also for the Freshly Made Sketches #662 blog challenge for the week. It's so fun to create for a sketch. So much time is saved when you use a sketch to create. Today is a 2 for 1.


If you haven't seen the Reindeer Days products, you are missing out. Everything from the stamp set and dies to the designer series paper and embellishments are wonderful! The Reindeer Memories Sticker Sheet was used as my focal points and images. In fact, I didn't even pull out any inks or stamps today. 


This first card used the solid die-cut when I layered the dies. I love that it is a solid glimmer behind that awesome deer stringing up the lights on the tree. How about that designer series paper! Those Reindeer as super cute. 


This card is the same layout as the first one, but it is using the "frame" that was created when you layered the dies when diecutting. I love this being used as a "wreath". 


Aren't the Reindeer Memory Stickers just fabulous? I am blown away by the artistry!


You can check out all the Freshly Made Sketch #662 entries for more fabulous projects. Watch my video for more details on how to layer your dies to get double the cardmaking fun!


Until Next Time...

Mary Blocher
Mary's Stampin' Café

Tuesday, November 5, 2024

Playing Along with Freshly Made Sketches & Sheetload of Cards


Hi Everyone,

Thanks for stopping in today for my double purpose of my project. I was creating this super cute card for the October Sheetload of Cards and it happens to fit perfectly for the current Freshly Made Sketches challenge for this week. It's so great like a buy one get one free promotion. 

At first when I saw the FMS #660 by Judy, I thought I needed to create a stunning center oval card. Guess what? I read the blog and it said elegant or cute, so I opted for the cute! 


The card layout for my project was also part of the #sheetloadofcards for October. I love downloading the sheetload of cards each month and creating with the sketch layout they have for the month. It's amazing how many variety of projects you can get with one sheetload template. The super cute fox is from Tracy Hey designs created with alpaca pals an organization that rescues alpacas. 


Don't forget to "dress up" the inside of your cards with a bit of DSP. I used the wonderful 6" x 6" Iconic Celebrations DSP pack. There are 48 sheets of many occasional double-sided papers to choose.


I guess you could say that my project today is like a buy one and get two free because my participants at my Stamp & Chat Saturday will be creating this card too. Be sure to check out all the wonderful projects crafters have uploaded for the FMS #660 sketch challenge. I hope you enjoyed my card today. It was so much fun creating with the super cute fox. Be sure to check out all the wonderful sheetload of cards too

Be sure to check out all the new releases that came out with Stampin' Up! today as well. There are 2 new Kits and many Online Exclusive releases to gobble up. You can shop and check out my stamping events too. 

Until Next Time...

Happy Stampin',

Mary Blocher
Mary's Stampin' Café

Sunday, October 13, 2024

Happy Birthday for Freshly Made Sketches


Hi Everyone,

I'm just in time to share a card for this past week's Freshly Made Sketches 657. The card I'm sharing is for a make-n-take at a crafting weekend I'm attending. I decided to have a few cards for anyone to create over that weekend coming up. I wanted to design it with the FMS 657 Challenge in mind.

If you follow my blog, you know that I love sketch layouts. It makes it so easy to create a card when the hard work of the design or layout is already done for you.


I love the way my card turned out! The Iconic Celebrations 6" x 6" DSP pack has great papers for so many occasions and seasons. 

Se sure to check out other creative projects over at the Freshly Made Sketch Blog. I love seeing what others have created. 


Until Next time...
Mary Blocher
Mary's Stampin' Café

Tuesday, October 8, 2024

12 Cards + a Bonus Project Double Wonder/One Sheet Wonder Recap


Hi Everyone,

I'm not sure how I managed to take this selfie and hold those 12 fabulous holiday cards from my Double Wonder/One Sheet Wonder Holiday Style class. Creating card classes is one of my favorite things in my stampin' Café. Yes, it can be a lot of work once you design the projects to prep, sort, and have class packets ready, but once everyone is together, all that hard work is all worth it. 


This Double Wonder class was the second one I designed. The first one was with the Frames & Flowers Specialty Mix and Math papers. It was a really nice class both in person and to go. This time, the A Little Bit Festive Specialty Mix & Math paper just blew me away and I knew right away that I wanted to create another Double Wonder class with it. What does Double Wonder mean? You choose 2 of the sheets of DSP. Then you cut them to 6" x 12". When you create your projects, you will put the two designs of the 6" x 12" together. This gives you lots of variety in patterns for your projects. 
The first two cards are the "book binded" cards. They open like a book. the "spine" is glued after the ribbon is run through to mimic a book.
The next set of 4 cards included these wonderful cards. Two pieces of -4" x 3" DSP were cut on the diagonal to get four triangles. From there is was just time to get creative. It was so easy with all the wonderful Mix & Match ephemera pieces. 
These cute cards were created using two pieces cut at 4" x 3" from the DSP. In a Double One Sheet Wonder class, you create multiple of the same design. I really wanted to show the versatility when creating cards. I also couldn't resist making a "stand up" card with the super cute bear.


The next two cards are part of section C from the template. These are Gatefold Cards. Gatefold is usually like a 2-sided gate that opens. these are "off set" Gatefold cards. Can you tell why?


The last two projects were created using the bits and pieces of DSP that were left.

It's really hard to pick favorites, but I really like this last card. It may be my favorite next to the "stand up" card. Which cards are your favorite? I wanted to include my layout for this Double One Sheet Wonder class that I designed. Feel free to try it out and create your own set of fabulous cards. 


Here we are after we created all 12 projects. Oh, I almost forgot the bonus project. I always include a bonus project in my specialy classes. This goodie bag uses one of the Mix and Match card layer pieces. We diecut out just part of it for this pretty tag. What's inside the bag? Peppermint Pattys of course.


One of the best things about this class is the creativity and fun that my friends had. Here are a few of their projects.


Brenda and Bry created two really great cards having fun putting their own creative spin on cards.


I was so glad when Pam used that cute stocking ephemera on her gatefold card. When designing this class, I just couldn't make it work.


Julie really enjoyed going through all the parts and pieces of the Mix and Match pieces. Everyone who participated received a stamp case to store all those pieces. Both of the cards are ones that she created. I like that her gatefold card is horizontal.


Wow, that was quite a full blog of fun and creativity! I hope you enjoy all the projects I am sharing. Try out the Double Wonder One Sheet wonder template. Share your creations or let me know how it all worked out for you. Interested in my classes and events? Check out my website for opportunities. 

If you are hoping to use the A Little Bit Festive 12" x 12" Specialty Mix & Match papers, well it's unavailable right now. The paper is estimated to be back October 14th. I'm going to be giving away a package of the paper, so be sure to comment on my blog and let me know which card (s) you like best. One lucky winner will be chosen on October 12th. 

Until Next Time..
Happy Stampin',
Mary Blocher
Mary's Stampin' Café