Hi Everyone,
Thanks for stopping in today. I recently did a Facebook Live for these super cute "pocket cards". I shared several ideas for these too. I hope you read on for some super great ideas. You can create your own with just one sheet of designer series paper.
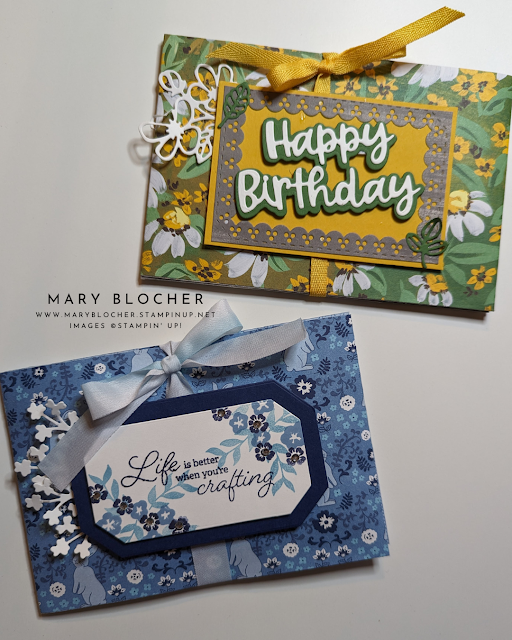
This first design was created for my Stampin' Café Team gathering. I saw my friend, Rachel from @sweetbeadesignsco create a "pocket card" for her pen pals using designer series papers. I thought it would be so fun to make these for my Café team filled with cardmaking supplies.
For the fun "card candy" I added some ovals, die cut flowers and leaves, and punched out shapes to be used on upcoming projects. You will have three pockets when you create this "pocket card". Here are some more ideas for these.
This one is so special for that tea lover. I started the day with a Lemon Zinger Herbal blend. Then a mid-day pick up with Tumeric energy. Finally, in the last pocket, some SleepyTime tea for a good nights rest. I'm going to send this off to my far away friend, Cindi. She joins me on Facebook each week and she loves tea. It's perfect!
This designer series paper is a blast from the past. Do you remember what it was called? It was Afternoon Picnic. I just love the vintage look of this designer series paper. I also used the retired Tea Together Bundle.
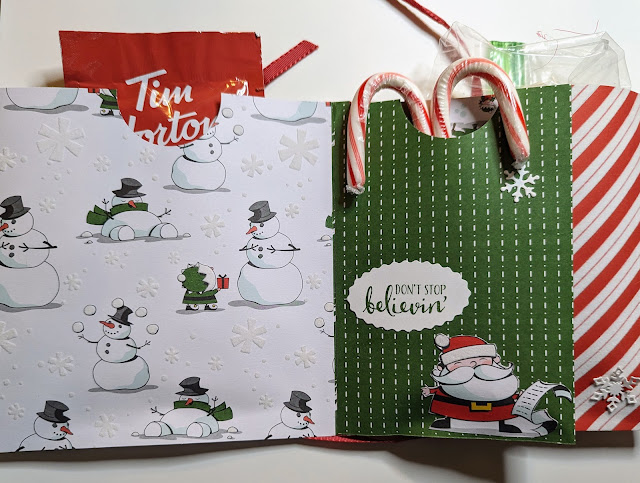
Now think about the holidays coming and create a perfect hot cocoa kit. The designer series paper for this pocket gift was the Santa's Workshop from last years holiday catalog.
You may have done a double take when you looked at this super cute hot cocoa "pocket card" kit. I filled it with hot chocolate, candy canes, and marshmallows. It is larger than my previous ideas. I'll share the measures for each below. You can watch my video for a tutorial on how to make them.
To make this standard "pocket card", here is what you need.
- 1 sheet of designer series paper
- Cut 2 pieces measuring 4" x 12" (pay attention to the DSP and if it has a specific way of going)
- Cut 1 piece measuring 4" x 8" (the left over piece can be used for the front of the card or accents inside of the card)
You can decide to make the front and back of your "pocket card" with the same designer paper (DSP), or use a coordinating designer series paper. I like that I can use one sheet of DSP to create one.
To make this larger "pocket card", you will need more than one sheet of DSP. Here is what you need.
- 2 sheets of DSP cut at 6" x 12"
- 1 piece of DSP cut at 6" x 8"
To know how to create your "pocket card" when you have your DSP cut, you can watch my video. It is really easy to put together. You just need a circle punch and liquid glue.
Thanks again for stopping in. I hope you are thinking of some ways to create these "pocket cards". It's a great way to use that wonderful designer series paper. Now is the perfect time for these with the 15% off DSP sale this month.


No comments:
Post a Comment